
WebDriver Basics and Setup instructions
A: What is WebDriver?
• WebDriver is a web automation framework that allows us to execute our tests against different browsers, not just Firefox (unlike Selenium IDE). WebDriver supports Firefox, Chrome, IE, Safari and Opera.
• WebDriver supports web as well mobile application testing so we can also test mobile applications (IPhone or Android).
• WebDriver also enables us to use a programming language to create our test scripts (that is not possible in Selenium IDE).
• We can now use conditional operations like if-then-else or switch-case. We can also perform looping like do-while.
• Following programming languages are supported by WebDriver
- Java
- .Net
- PHP
- Python
- Perl
- Ruby
B: WebDriver Installation -
There are 4 steps involved in WebDriver installation:
Step 1: Download and install Java in your system.
Step 2: Download and install Eclipse.
Step 3: Download WebDriver Java client driver.
Step 4: Start Eclipse and configure it with WebDriver.
Step by step guide:
Step 1: Download and install Java in your system.
First of all you need to install JDK (Java development kit) in your system.
Your text to link here...(http://www.oracle.com/technetwork/java/javase/downloads/index.html)
Step 2: Download and install Eclipse.
Download Eclipse for Java Developers, extract and save it in any drive. It is totally free. You can run 'eclipse.exe' directly so you do not need to install Eclipse in your system.
Your text to link here...(http://www.eclipse.org/downloads/)
Step 3: Download WebDriver Java client driver.
Selenium WebDriver supports many languages and each language has its own client driver. Here we are configuring selenium 2 with java so we need 'WebDriver Java client driver'. Click here to go on WebDriver Java client driver download page for WebDriver download file.
Your text to link here...(http://docs.seleniumhq.org/download/)
Downloaded 'WebDriver Java client driver' will be in zip format. Extract and save it in your system at path D:\selenium-2.xx.0. There will be 'libs' folder, 2 jar files and change_log in unzipped folder as shown in below screenshot. We will use all these files for configuring WebDriver in eclipse.

Step 4: Start Eclipse and configure it with WebDriver.
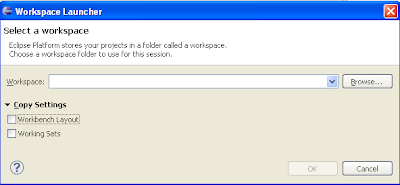
1. Select WorkSpace on eclipse start up:
Double click on 'eclipse.exe' to start eclipse. First time when you start eclipse, it will ask you to select your workspace where your work will be stored as shown in below attachedscreenshot. Create new folder in D: drive with name 'Webdriverwork' and select it as your workspace. You can change it later on from 'Switch Workspace' option, that is available under 'file' menu of eclipse.
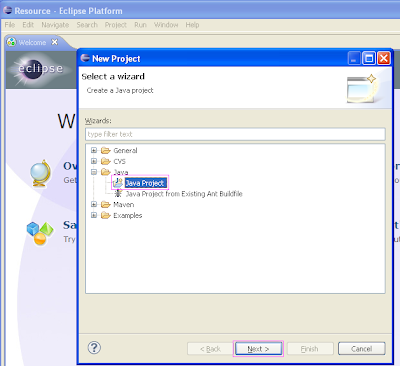
2. Create new project:
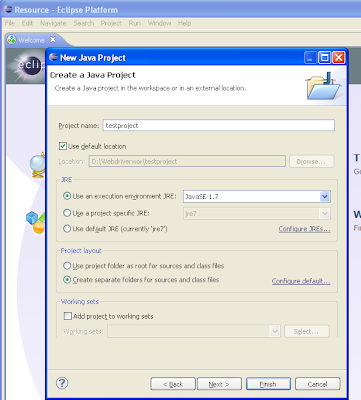
Create new java project from File > New > Project > Java Project and give your project name 'testproject' as shown in the attached screenshot. Click on finish button.
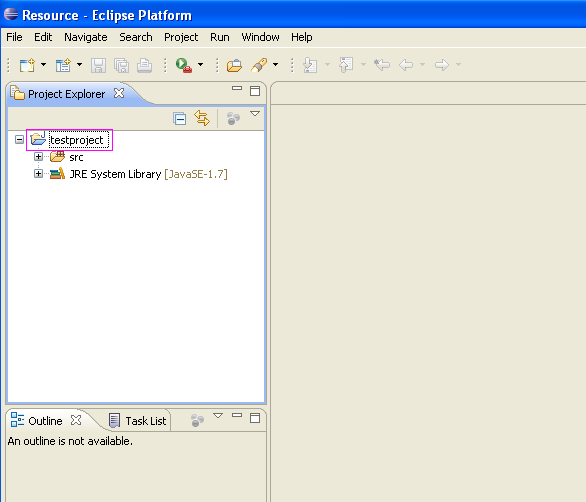
Now newly created project 'testproject' will display in eclipse project explorer as shown in screenshot.
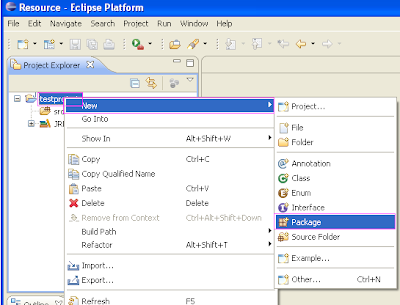
3. Create new package:
Right click on project name 'testproject' and select New > Package. Give your package name = 'mytestpack' and click on finish button. It will add new package with name 'mytestpack' under project name 'testproject'.
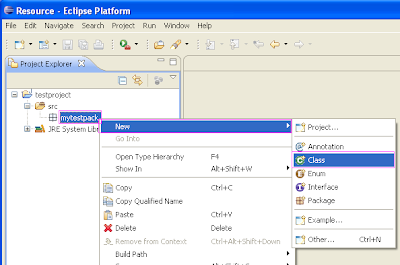
4.Create New Class:
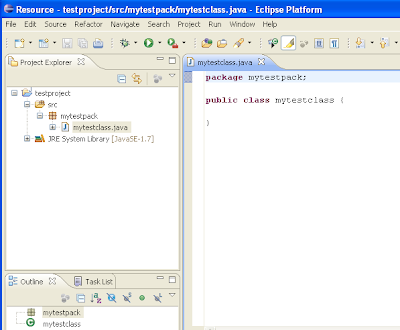
Right click on package 'mytestpack' and select New > Class and set class name = 'mytestclass' and click on Finish button. It will add new class 'mytestclass' under package 'mytestpack'.
Now your Eclipse window will looks like below shown screenshot.
5.[IMPORTANT STEP] Add external jar file to java build path:
Now you need to add selenium webdriver's jar files in to java build path.
a) Right click on project 'testproject' > Select Properties > Select Java build path > Navigate to Libraries tab
b) Click on add external JARs button > select both .jar files from D:\selenium-2.xx.0.
c) Click on add external JARs button > select all .jar files from D:\selenium-2.xx.0\libs
Now your testproject's properties dialogue will looks like below.

That's all about configuration of WebDriver with eclipse. Now we are ready to write our test in eclipse and run it in WebDriver.__