
Netlify offers free static website hosting with features like continuous deployment services, user-authentication, and form-handling. But static sites have limitations to perform server-side operations. These limitations have been addressed by Netlify by providing features to create Serverless Functions.
In this blog, we'll create a simple application that displays a positive quote when we click the button. The quote displayed is returned from the API we'll create using netlify lambda function and deploy it. So let's get started.
What is Serverless Computing?
Serverless computing (or commonly referred to as serverless) is an execution model where cloud providers execute the piece of server-side logic, written by the application developer, by dynamically allocating resources. The code execution is run in stateless containers triggered by events like HTTP requests, cron jobs, database events, etc. The code written by the developer is sent to the cloud provider in the form of a function. Hence, it is also sometimes referred to as Functions as a Service or FaaS or Serverless Functions.
Serverless doesn't mean there is no server at all. It means the developer doesn't have to worry about handling server-side stuff like creating a Node server. The developer just has to focus on the functionality and rest will be handled by the host(here Netlify). Netlify lets you write serverless functions called Lambda functions, which are the type of serverless functions that are hosted on Amazon's AWS cloud platform.
Initializing the application
Let's create our project by running
npx create-react-app netlify-functions
cd netlify-functions
We create components folder in root/src folder and add a component called PositiveQuoteGenerator.
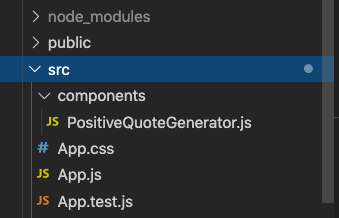
We create a simple UI for the application having just the quote and the button to view a new randomly generated quote. The code for the component PositiveQuoteGenerator is as follows:
Creating the Lambda Function
Next, we add a folder functions in root/src folder. This folder will contain our lambda function. Let's create a file called getPositiveQuotes.js inside the functions folder.
The boilerplate for a lambda function is
exports.handler = function(event, context, callback) {

}
The function takes 3 parameters:
event: contains useful information from a client like- header and body of the requestcontext: contains information from Netlify like user informationcallback: the function that tells how to return a response to the user
We add our code for the function as follows:
Explanation
Here, we add some quotes in the quotes array and assign a random quote to res. Then we call callback(), with the first parameter as null specifying no error to Netlify and response object with statusCode 200 and body with res in a stringified manner.
Run the Lambda Function locally
To run the lambda function locally, we install a package netlify-lambda,
yarn add netlify-lambda
Following the instructions from the docs for the package, we add a script in package.json
"start:server" : "netlify-lambda serve ./src/functions"
netlify-lambda serve <function-folder-path> command helps in proxying the deployment of lambda function from <function-folder-path> at development environment. When our function is deployed locally, it will be available at http://localhost:9000/.netlify/functions/function-name.
Now, if we start the app and start the server, we may come across CORS error. To fix this, we need to configure proxy manually .
First, we install http-proxy-middleware.
yarn add http-proxy-middleware
Next, we create src/setupProxy.js and add the following contents in it:
Now, in our component PositiveQuoteGenerator we add a state variable called quote to display randomly generated quotes. The getQuote() will make a call to our lambda function getPositiveQuotes and the quote received in response will be set to quote.
Our lambda function will be built by netlify-lambda and will be placed in some directory.
For that, we create a folder in the root called functions. Now, in root create a file called netlify.toml used for configuring Netlify and add following code:
The code in netlify.toml tells Netlify where our lambda function will be built i.e. functions folder.
Next, we run our application,
yarn start
to start our application and
yarn start:server
to access our lambda function
our application looks as follows:
Building our Lambda Function to Netlify
For building our lambda function to Netlify, we make few modifications in scripts,
we first rename buildcommand to build:app .
Add script for building lambda functions
"build:functions": "netlify-lambda build ./src/functions"
build command of netlify-lambda takes source folder (./src/functions) and outputs it in build folder specified in netlify.toml.
Set up for deployment
We then add the script build in package.json as
"build" : "yarn build:app && yarn build:functions"
Next, we specify build command in netlify.toml to tell Netlify to run build command while deploying and also specify build folder for publish key.
Now, we initialize git and push our changes to the repo netlify-functions in GitHub.
We then Sign-in in Netlfy, click New site from Git, click GitHub.
Since our project has netlify.toml therefore, there is no need to specify any options such as Build Command. We simply click on Deploy Site. After some time, the site will get deployed.
We can then see our lambda function in functions. We can also check the function by pasting the URL into the browser.
You can clone this GitHub repo and experiment with the same.
Thank you for reading.