
As a Developer, you have many challenges while you are working with many environments and endpoint in the same project. Without environment setup, you have to set the endpoint and certificate every time for a different environment. If we Configure Xcode for the different environment, It takes care of all endpoint, certificate and bundle ids. so the user can test all beta, dev and live app on the same device.
So, let's start with creating Endpoint
Endpoint Configuration
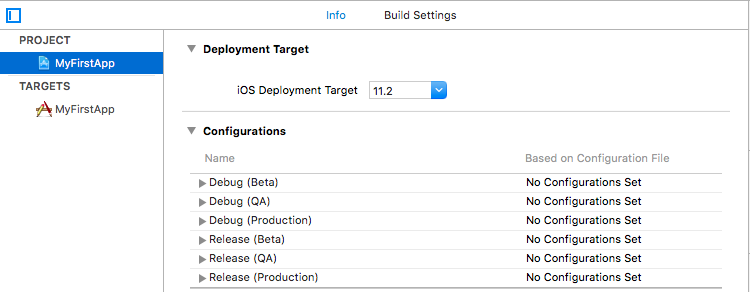
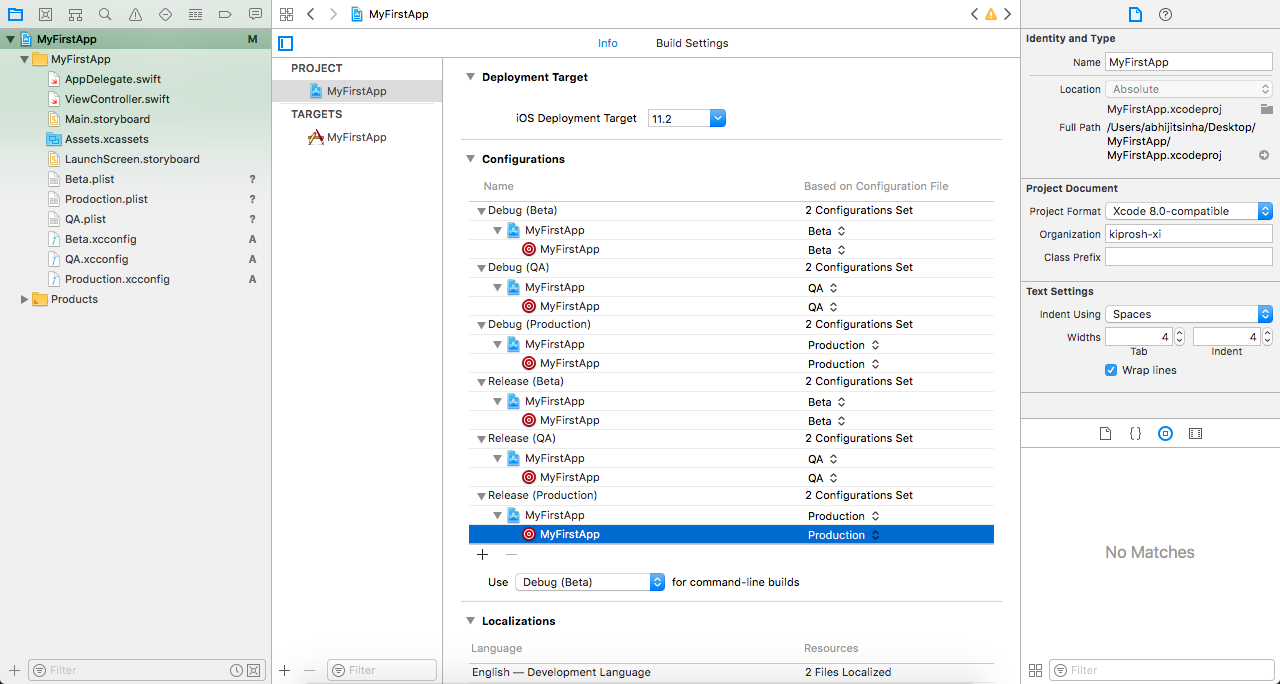
The first thing that you have to do is prepare Xcode configurations for the environment you want to use. In this post, I am creating an environment for Beta, QA and Production.
for Configuration go to Project info section and in configuration section add or edit the variable name that you want.
Creating schema
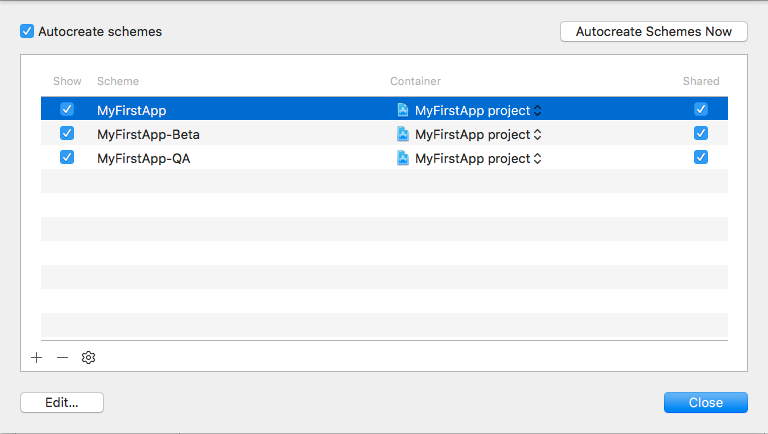
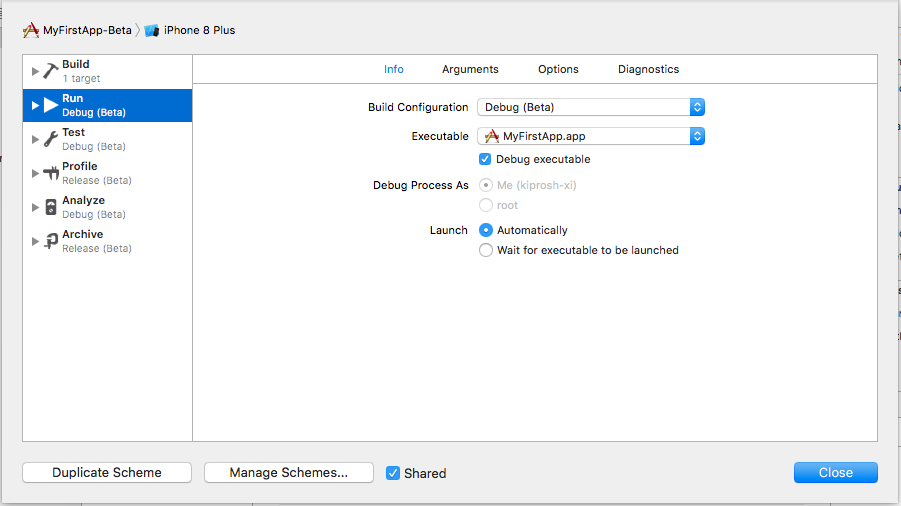
Once you have done with project configuration you have to create a schema for a different environment.
For that, go to manage schema and add or rename current schema as Beta, Qa and production.

After editing schema, It will look like this.
Add Configuration Settings Files
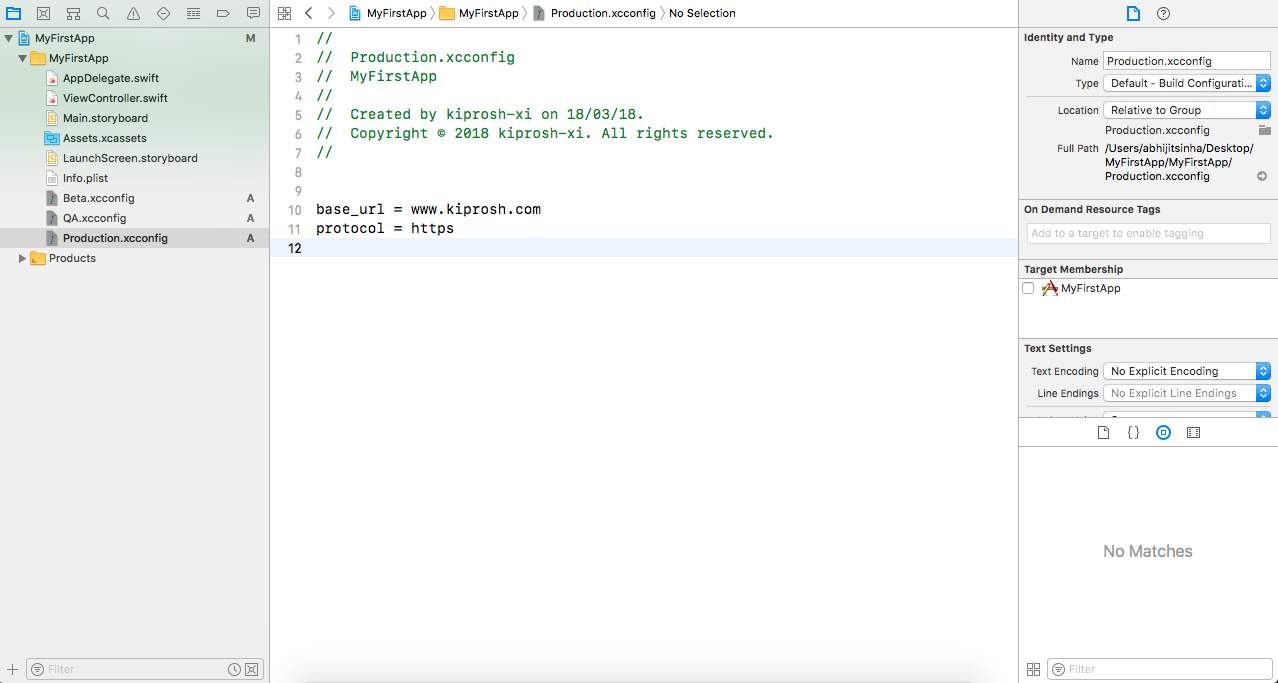
for add endpoint details right click on Project and add Configuration Settings File with the same name as we used in Configuration. Once the file created add base URL and protocol for the particular file.
Add PList Files
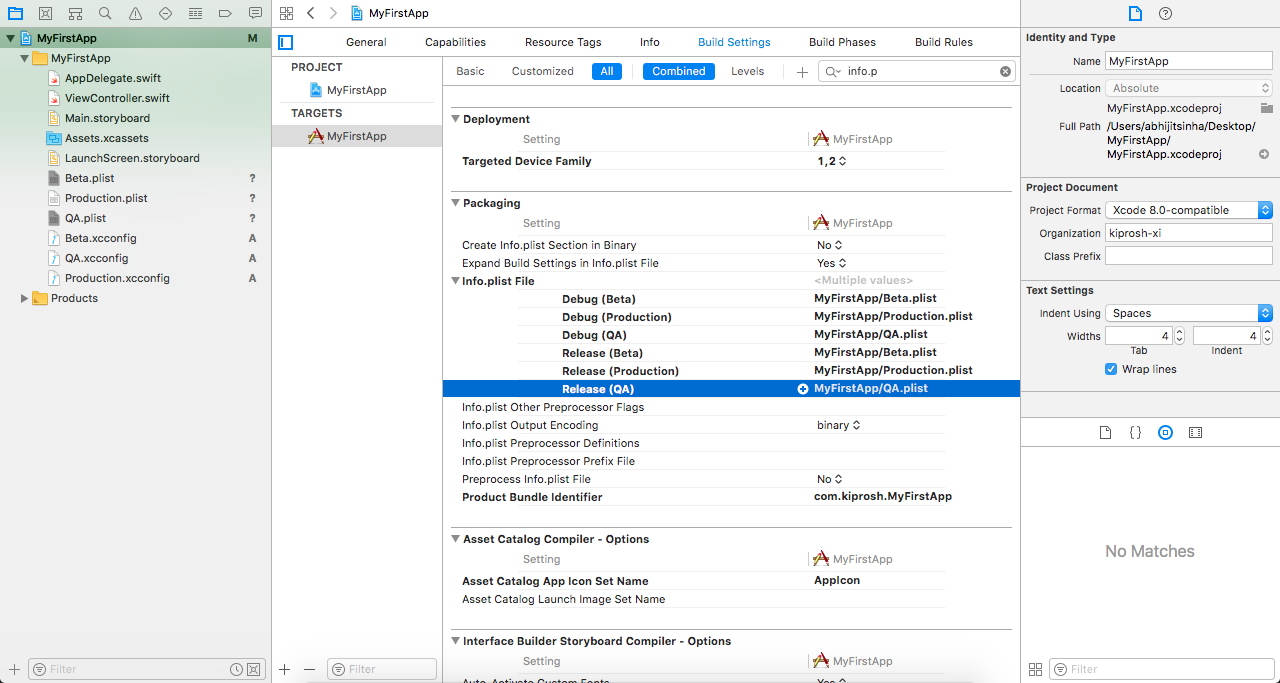
Copy and paste your current plist file and rename with Beta, Qa and Production. after that add key that you created in Configuration Settings Files. after that update your info.plist file details in project build setting section
Add Configuration setting file in project configuration
go to project info and in the Configuration section click on the different environment and select Configuration setting file for the particular environment.
Link Schema with the build Configuration
Once you did all step, the last step is to link schema with the build Configuration. For that open Edit schema and add build Configuration.
** Configure Class for Environment**
import Foundation

public enum PlistKey {

    case baseURL
    case urlProtocol

    func value() -> String {
        switch self {
        case .baseURL:
            return "base_url"
        case .urlProtocol:
            return "ptotocol"
        }
    }

}

public struct Environment {

    fileprivate var plistDetails: [String: Any]  {
        get {
            if let infoDictionary = Bundle.main.infoDictionary {
                return infoDictionary
            }else {
                fatalError("Plist file not found")
            }
        }
    }

    public func configuration(_ key: PlistKey) -> String {
        return fetchValueFromPlistDetails(key: setKeyForPlist(key: key))
    }

    public func setKeyForPlist(key: PlistKey) -> String {
        switch key {
        case .baseURL:
            return PlistKey.baseURL.value()
        case .urlProtocol:
            return PlistKey.urlProtocol.value()
        }
    }

    public func fetchValueFromPlistDetails(key: String) -> String {
        guard let plistValue = plistDetails[key] as? String else {
            return ""
        }
        return plistValue
    }

}
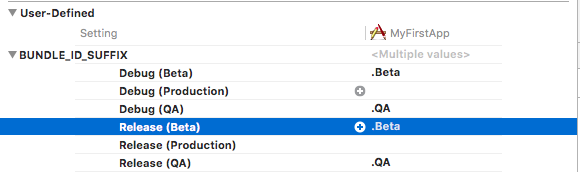
Set Different App Icon and App name based on Environment
Open your Images.xcassets file. add new app icon and set name as AppIcon.Beta and AppIcon.QA. After that go to project build setting and add User Define Setting and insert a new variable.
Once it has done go to Asset Catelog App Icon Set Name section in build setting and append user define variable
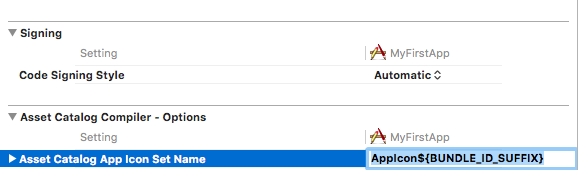
You can do same thing for app name too by changing Product name.

Now your app is ready with Environment setup.