
Visual Studio database project is one of the awesome tool provided by visual studio for managing database changes across all environments and developers machine. We can manage database changes same way as we manage the code changes using version control. VS database project helps to keep everyone in sync with the changes in database.
For effective use of database project and make development easier, we should follow some things like, Developers should use local SQL Server, names of databases should be the same in all development machines and credentials to access database are same in all developers machines
Lets see how to create and use database project :
- Create new SQL server database project
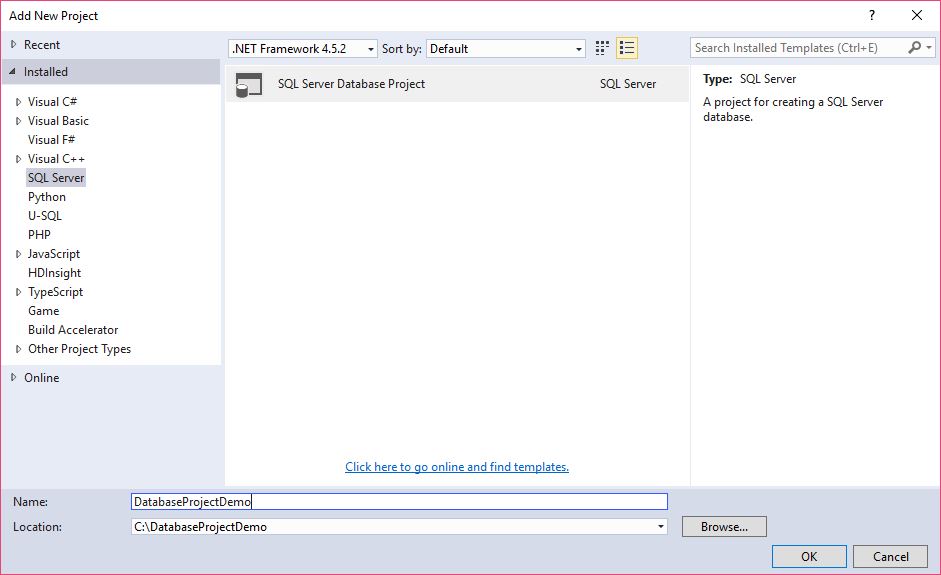
You can add new database project to your existing project. Click on your project solution and add new project. Select SQL server as shown in image below.
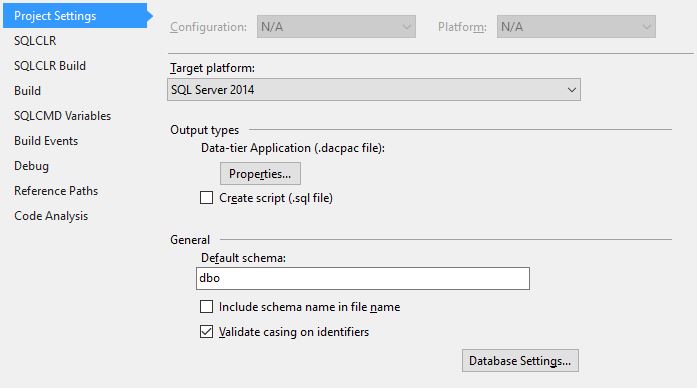
Select the target platform :
For selecting target you can simply right click on your db project and go to properties. Select platform compatible to your database. I am using SQL Server 2014 as shown in image below.
Create a schema comparison :
Schema comparison helps us find changes in database and update it locally as well as push the changes from local to db project. You can create schema comparison by right clicking on db project and select schema compare. It allow us to compare two different schemas.
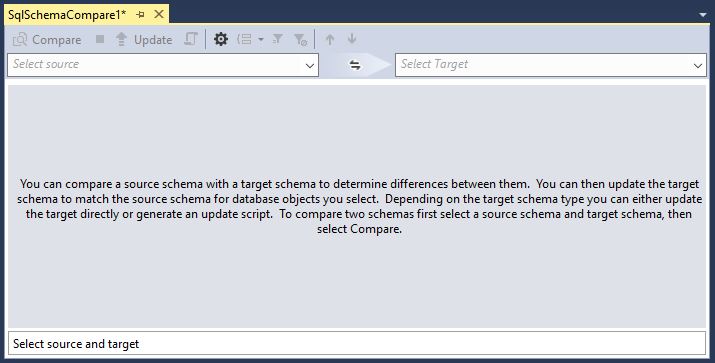
As you can see in image above it has two options source and target schema.
When you create schema comparison, by default source is your db project. In order to update your local database set local database as target schema.
If you have any database changes that you want to update to db project schema, you can change the source to your local database and set target as db project schema.
Once you select source and target by providing information to connect to databases. You can perform comparison.
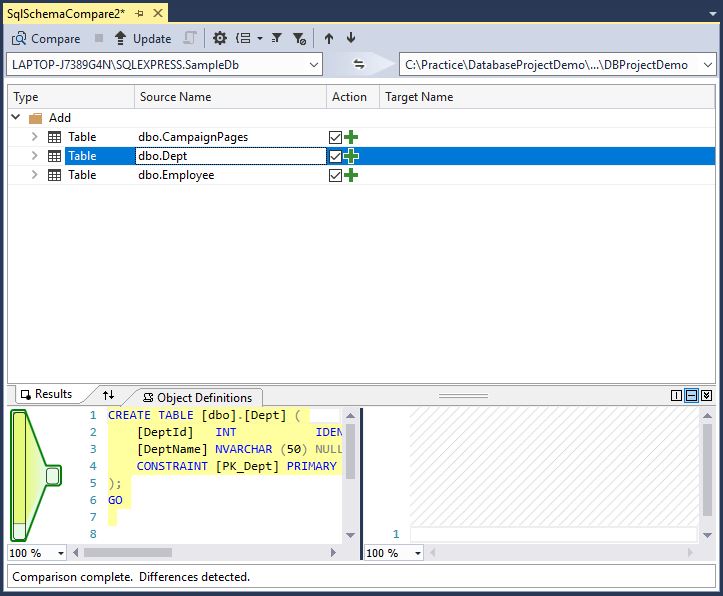
As my db project schema is empty. I am updating my db project schema with local db. You can see the result of comparison in image above. Once i click update button it will update the db project schema. After updating schema you can see in solution explorer that schema gets created under your db project.
As all development machines have same database settings, you can save schema comparison files.
- Create post deployment script :
When there is some breaking changes, due to which there is inconsistency in database and you want to recreate your database. It will be very difficult to start again,you have to insert all data again in database to make things work.
In order to avoid this, we can create post deployment scripts which can help us to add default data to fresh database and regain your work quickly.
Keep on adding necessary data to post deployment scripts, make sure that your post deployment scripts are up to date.
- Publish Profile :
Well when you want to delete and recreate database. Schema comparison won’t work for you. It can recreate database but can not add default data to database. You have to do it manually my copy paste from post deployment scripts. But why do so much work when we have other options.
Database project has Publish option which take cares of all this work. When you click publish, it will ask you for database connection as shown in image below.
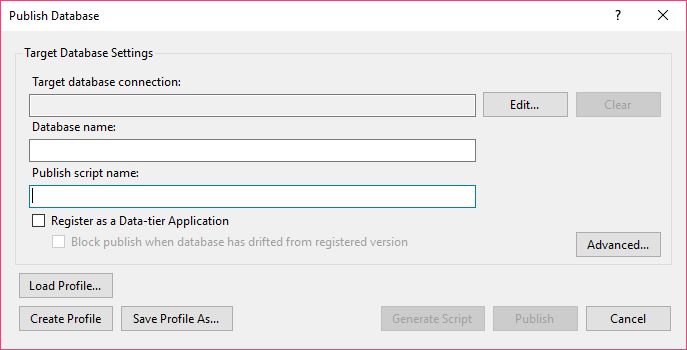
Hit publish and it will do your job. You can generate script and run it manually. Clicking on advanced shows another window where you can check and uncheck settings based on your requirements. This settings are save with your publish profile.
Using Database project has lots of benefits,like
-
Post Deployment scripts are helpful to have a default data
-
Schema comparison is helpful to track the differences between the database schemas
-
Good place for documentation of a database
-
Easy to use for developers.
-
Developer can recreate database and start working again within short period of time with minimal efforts.
References: