
Devising ideas to writing code and finally deploying finished products can be quite tedious at times. You need to handle many things beyond just writing the code. But what if you could take some of this work off your shoulders? Well, this is where GitHub Actions really shines.
In this article, we will cover how to create a workflow that will trigger the deployment using GitHub Actions into GitHub Pages whenever there is any change(s) found in the master branch of the repository.
Lets go through some fundamentals 👨🏻💻
Already know these fundamentals? You may then skip directly to action here 🏗
Continuous integration (CI)
Continuous integration is a practice where developers merge their code changes into a central repository, after which automated builds and tests are run.
Continuous Deployment (CD)
Continuous Deployment is related to CI and refers to keeping your application deployable at any point or even automatically releasing to a stage or production environment.
GitHub Actions
GitHub Actions allow you to automate your workflow by letting GitHub handle processes that can be triggered by a variety of events on the platform, be it testing your code, making a release or creating issues among others.
What can you do with GitHub Actions? The possibilities are limitless, you could do anything from:
- Handling CI and CD (Build, test, and deploy applications)
- Trigger alerts via email/SMS
- Performance monitoring
and much more!
DevOps
DevOps is a set of software development practices that combine software development (Dev) and information technology operations (Ops) to shorten the software development life cycle while delivering features, fixes, and updates.
Enough of talking, let's start with some actions! 👷🏼♂️
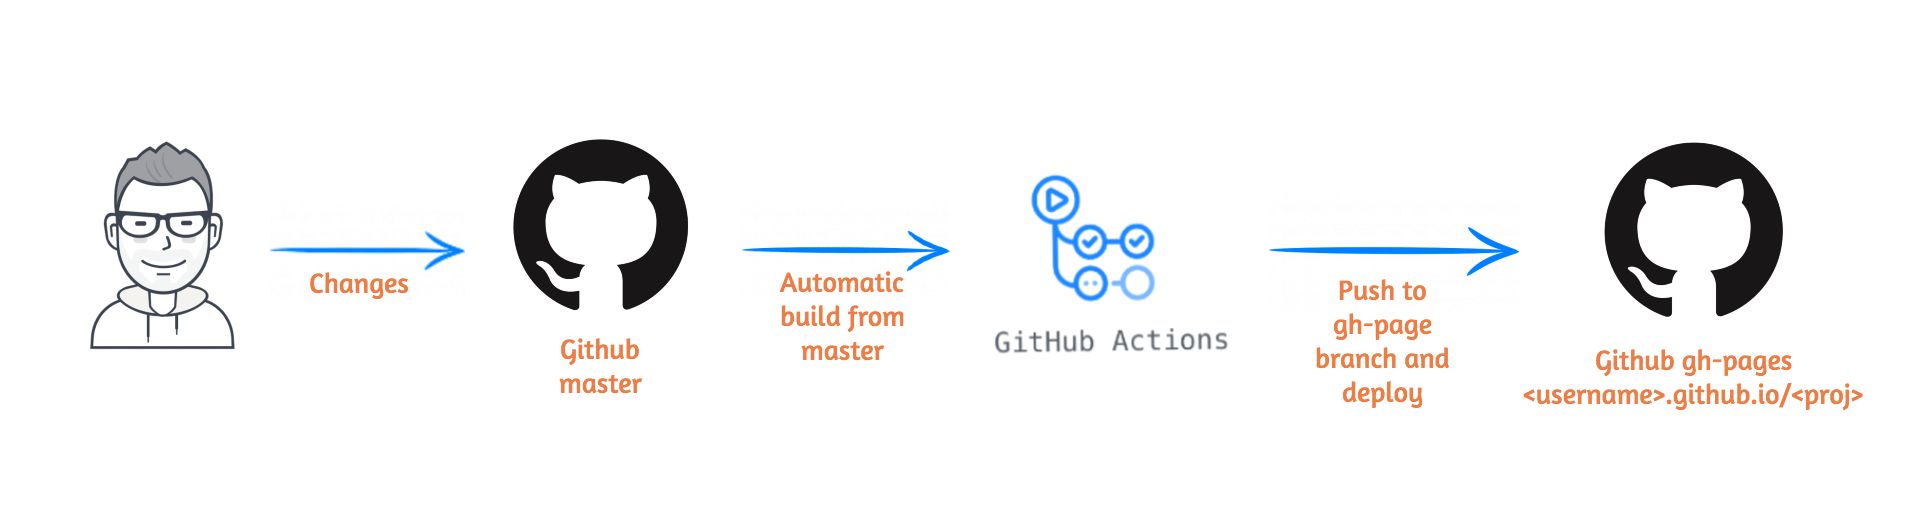
Following is the workflow which we are going to create
First we will start with setting up gh-pages to your repository.
Steps:
-
Create a React app using create-react-app:
npx create-react-app my-app -
Add the following properties to
package.jsonfile.
Now let's setup GitHub Action 🔥
GitHub Actions work by using configured workflows that contain actions and their relationships with each other.
There are a couple of ways to set up the actions either by writing and committing the file or through GitHub GUI.
We will cover the GitHub GUI for ease of understanding.
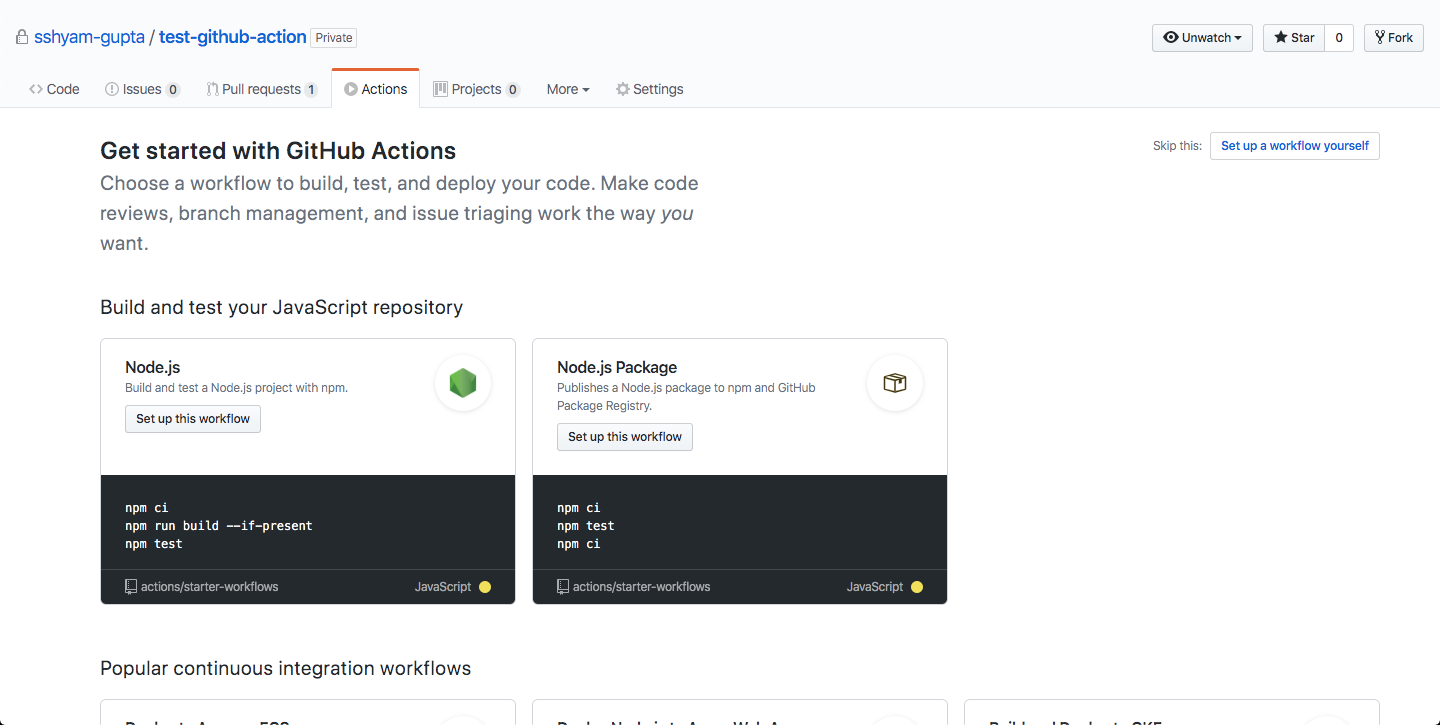
Go to your GitHub repository. You can notice that you have a new tab called Actions:
Step 1: Click on the Actions tab and New Workflow button as following.
Step 2: Select Node.js template.
Step 3: Update your template as following:
Explanation:
In the configuration above:
- Line 2-4: This part specifies which branch to watch for changes. In this case the Action will be triggered when any changes occur on the master branch.
- Line 9: You can use different types and version on virtual host machine. We used
ubuntu-latestto specify the latest version of an Ubuntu GitHub-hosted runner. - Line 11-12: The standard checkout action. Find more here.
- Line 14-18: The build step. Will install the dependencies and create the build.
- Line 20-25: This GitHub action will handle the deploy process of your project to GitHub Pages. Find more here.
- Line 27-31: This uploads the artifact to workflow. Find more here
Note: For Line 23, you need to generate an access token in Developer settings and add it in your project's secrets:
Project Settings → Secrets → Add a new secret
For detailed commands please refer to the Workflow syntax for GitHub Actions
All set 🚀
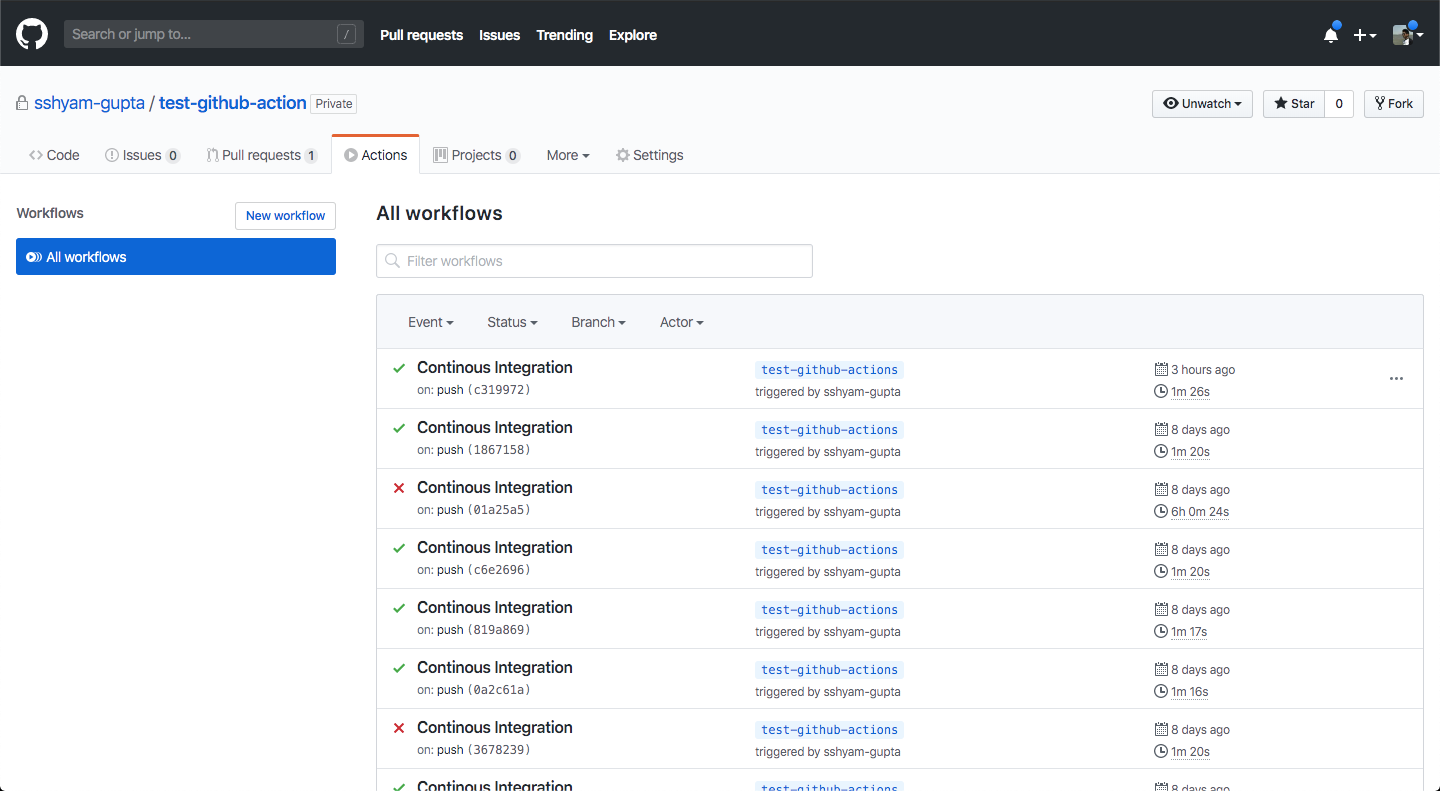
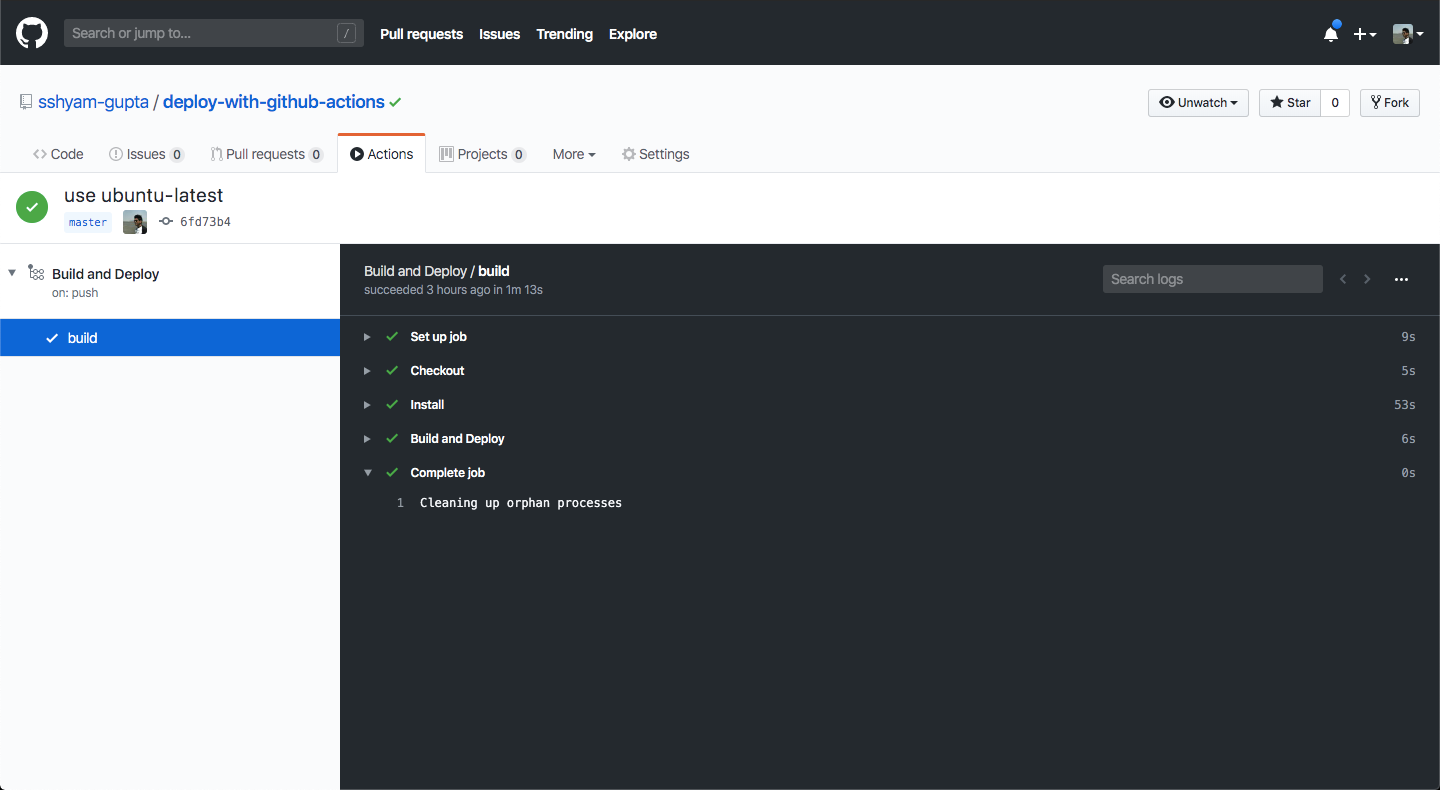
Everything is in the place, push your changes and watch the magic operate in the Actions tab 🧙🏼♂️
Conclusion
It's easy to create a pipeline with GitHub Actions. This helps you automate your project without using any external CI/CD like Circle CI, etc.
You can clone this GitHub repo and experiment with the same.
Thank you for reading.
References: