
In the previous article we had seen how to install Umbraco in visual studio. In this article we will discuss about the concepts needed to start creating web site and publishing content.
To create content and pages we must know 3 basic elements in Umbraco:
1. Document type:
It refers to type of content to be stored. Document type contains different property editors like rich text editor, media picker, content picker and grid editor. Property editors define what kind of data is to be stored . We can also create property editors by creating new data type. Umbraco give us freedom to create a new data type using existing one.
2. Template:
It provides a view to display data .With every document type one template is associated with it. Here you render the fields in document type using the html and razor syntax.
3. Content node:
Here actually the contents are created, saved and published which user will see. The type of content is specified by the document type. The hierarchy of nodes is most important.
To better understand you should use umbraco starter kit as it will give you some idea to start with creating templates and contents. For developers and content editors umbraco has provided backoffice you can open it by using url “Localhost:56484(portno)/Umbraco/” .
Let’s start with creating the simple web page for displaying blogs:
A. Create document type:
We will create two document type with name 'Blog' and 'BlogList'.
Steps to create Blog document type:
1.Go to Setting> Document Type>
In that there are three options if you select Document type then it will create a template with same name as document types name. But if you select Document Type without a template option then for that document type, you have to create a template and attached that template with a particular document type. We can use content of a document type in more than one template .
Give the name to the document type as ‘Blog’ .
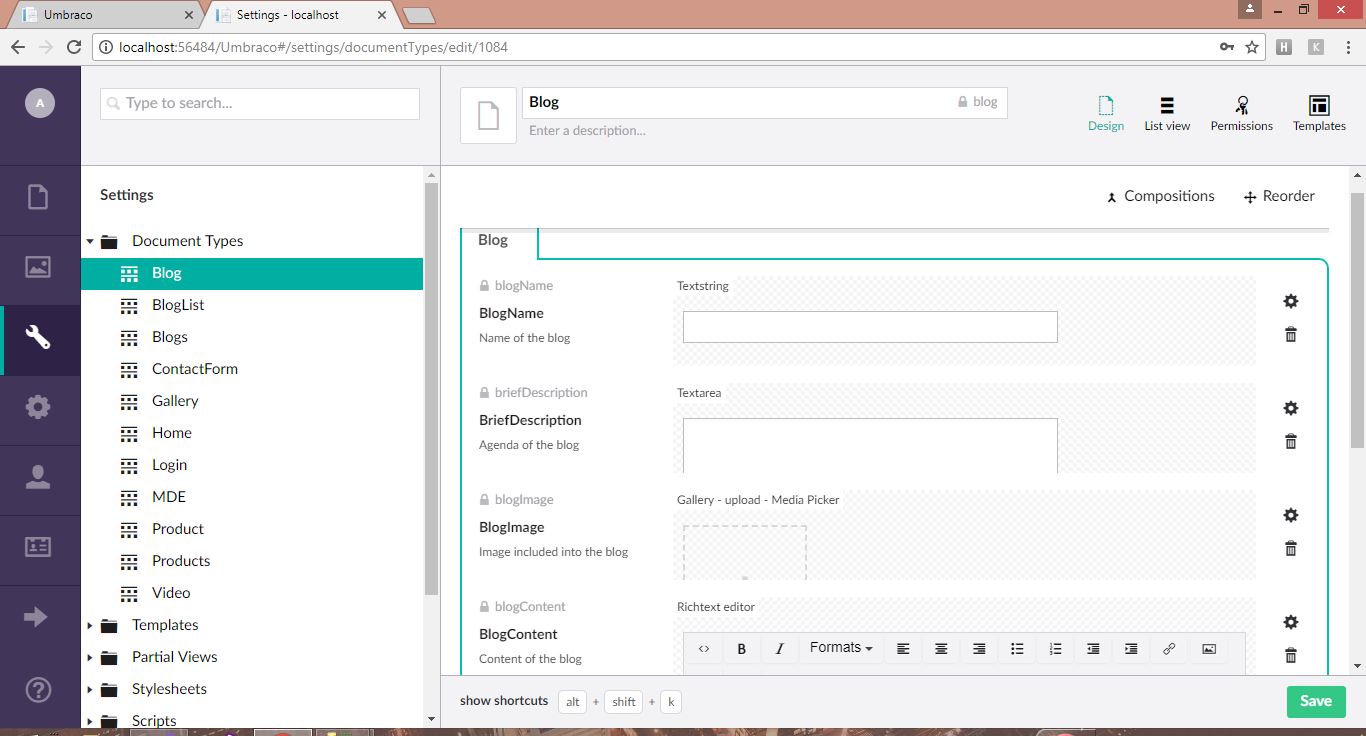
2.Add properties and property editor in Document:
Click on add property. The property settings pop up will come .Select editor from the list of available editors or if you have already use that editor you can reuse it.
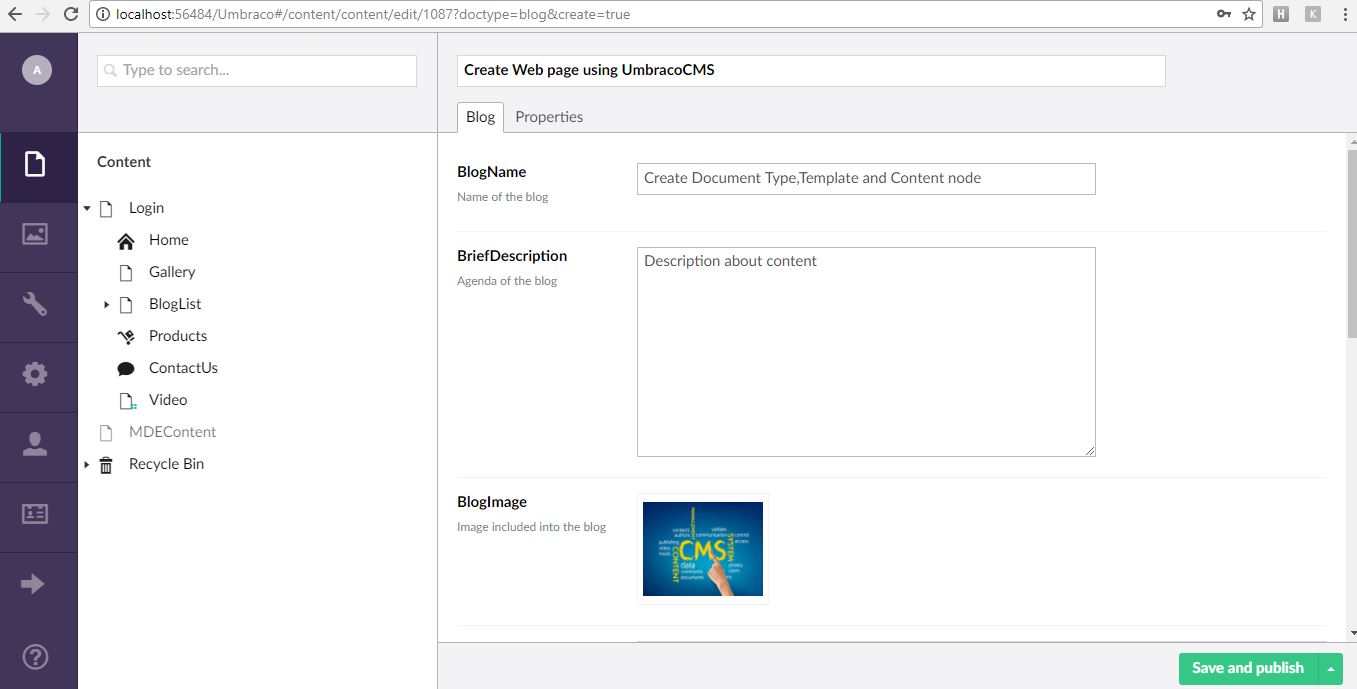
We used property editors like Text area, Text string , media picker for uploading image and rich text editor which gives us editor like Microsoft Word using which we can edit the blog as we want The property which we have used are shown in following image:
3.Save the document type.
Steps to create BlogList document type:
This will be used for listing all the blogs.
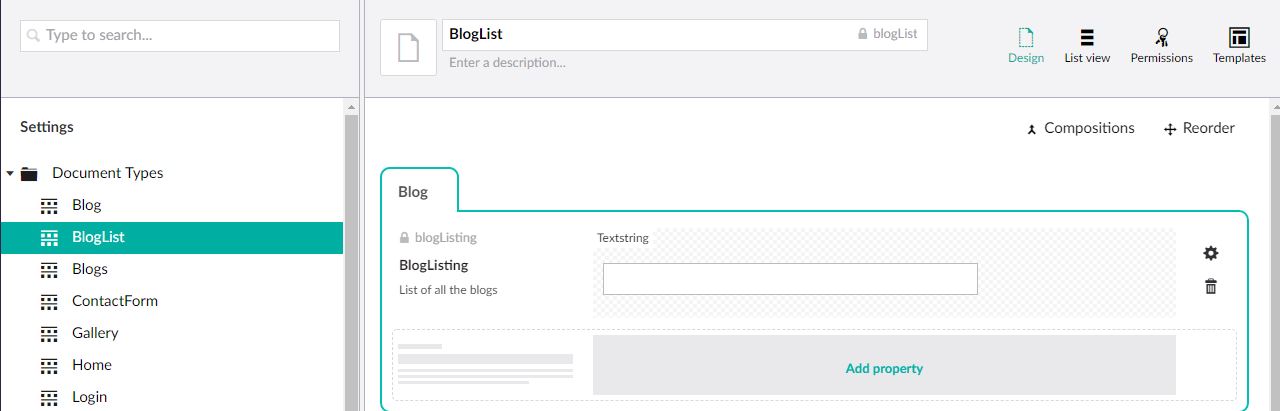
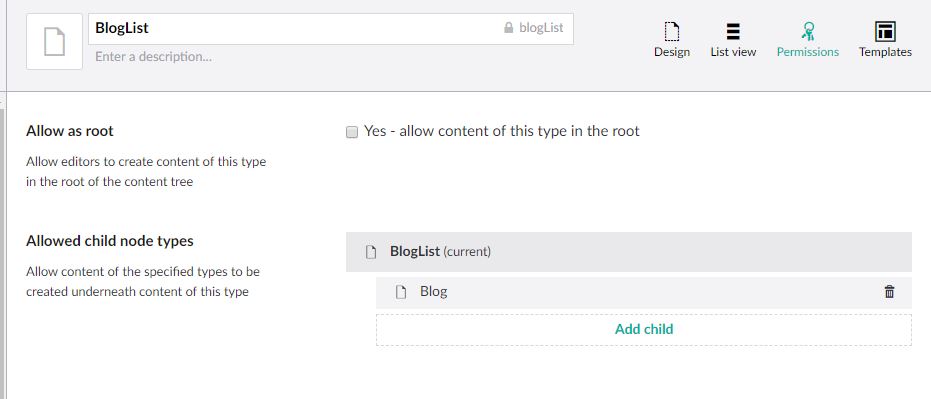
Follow the same steps as we did to create 'Blog' document type. In 'BlogList' we have to do an additional setting to add all the blogs in the blog list. For that go in the permission and add child 'Blog' in the allowed child nodes . If you check the checkbox for 'Yes allow the content of this type at root' then in content node you can create Content node of this type at root. After doing this save the document type.
B. Create template to display content of document type named Blog:
By default the template with same name is created as that of document type.
Template for Blog:
1.Go to Settings>Template> 'Blog' .
Here add the following razor code for displaying fields
@inherits Umbraco.Web.Mvc.UmbracoViewPage<ContentModels.Blog> @* 'Blog' content model is used in this template*@
@using ContentModels = Umbraco.Web.PublishedContentModels;
@{
	Layout = "HomeLayout.cshtml";   @*HomeLayout is the master template(shared layout)*@
}
<div style="margin-left:30px; margin-top:30px; margin-bottom:30px;">
<center><h1>@Model.GetPropertyValue("blogName")</h1></center> @* This is used to render the value of property with aliasName as 'blogName' in document type*@
<br><br>
@Model.GetPropertyValue("blogDiscription")
@Model.GetPropertyValue("blogContent")
<br><br>
</div>
2.Save the template.
Render the contents :
Following are the some ways using which we can render the contents with particular document type.
-
We can render the value of content in template by using the Insert option present at top of template. @Umbraco.Field("aliasName"): through this you can render any field on current page.
-
@Model.GetPropertyValue("aliasName"): It uses the current PublishedContentModel on this page.
Template for BlogList:
1.Go to Settings>Template> 'BlogList'
Here add the following razor code for displaying fields.
@inherits Umbraco.Web.Mvc.UmbracoViewPage<ContentModels.BlogList> @* Model of type BlogList*@
@using ContentModels = Umbraco.Web.PublishedContentModels;
@{
	Layout = "HomeLayout.cshtml"; @* Master template used*@
}
<br>
<div style="margin-left:20px;margin-top:30px;">
<center><h2>Blogs: Something More About Umbraco</h2></center>
<ul>
    @foreach(var item in @Model.Children) @*While creating the 'BlogList' we have allowed 'Blog' as child node so it will list all the Blog node under the BlogList@*
    {
    <br>
    <li>
          <font color="orange">@item.Name<br></font>
          <font color="red">Created At :</font>@item.CreateDate.ToShortDateString() @* CreateDate is the date of creation of contents*@
          <font color="red">Created by :</font>@item.GetPropertyValue("authorName")
          <br><br><div stle="margin-left:20px; ">
          @item.GetPropertyValue("briefDescription")
          </div>
          <a href=@item.Url><u>Read More</u></a>  @*@item.Url gives the url for that particular 'Blog' content node in 'BlogList'*@
    </li>
    }
</ul>
<br><br>
</div>
2.Save the template.
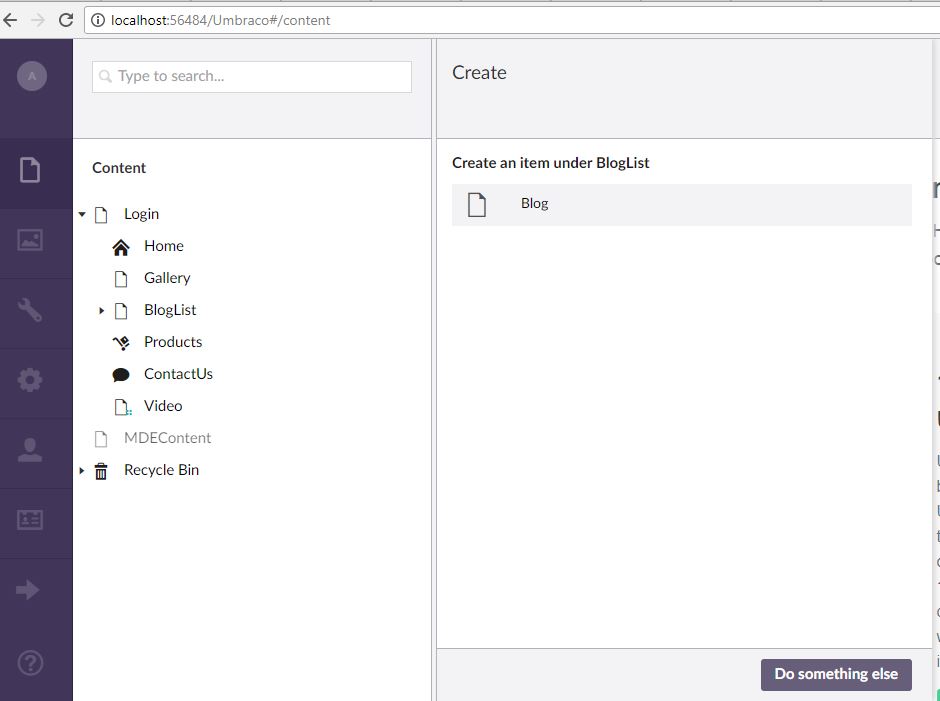
C. Create Content nodes
1.Go to the Content in the menu tab .
2.You will see three dots(...) to the side of Content click on that. One create section will open and it will list all the document type which are allowed at root node. From that select BlogList and create content node with name BlogList. Again click on 3 dots(...) and Create an item under BlogList will come . Select the blog and then Blog Content node will open.
3.After entering all the contents click on Save and Publish button. It will publish your content.
Now open your site(Here in the below image ,'BlogList' page of my site is shown) and go to the page where you are displaying and listing all the blogs.
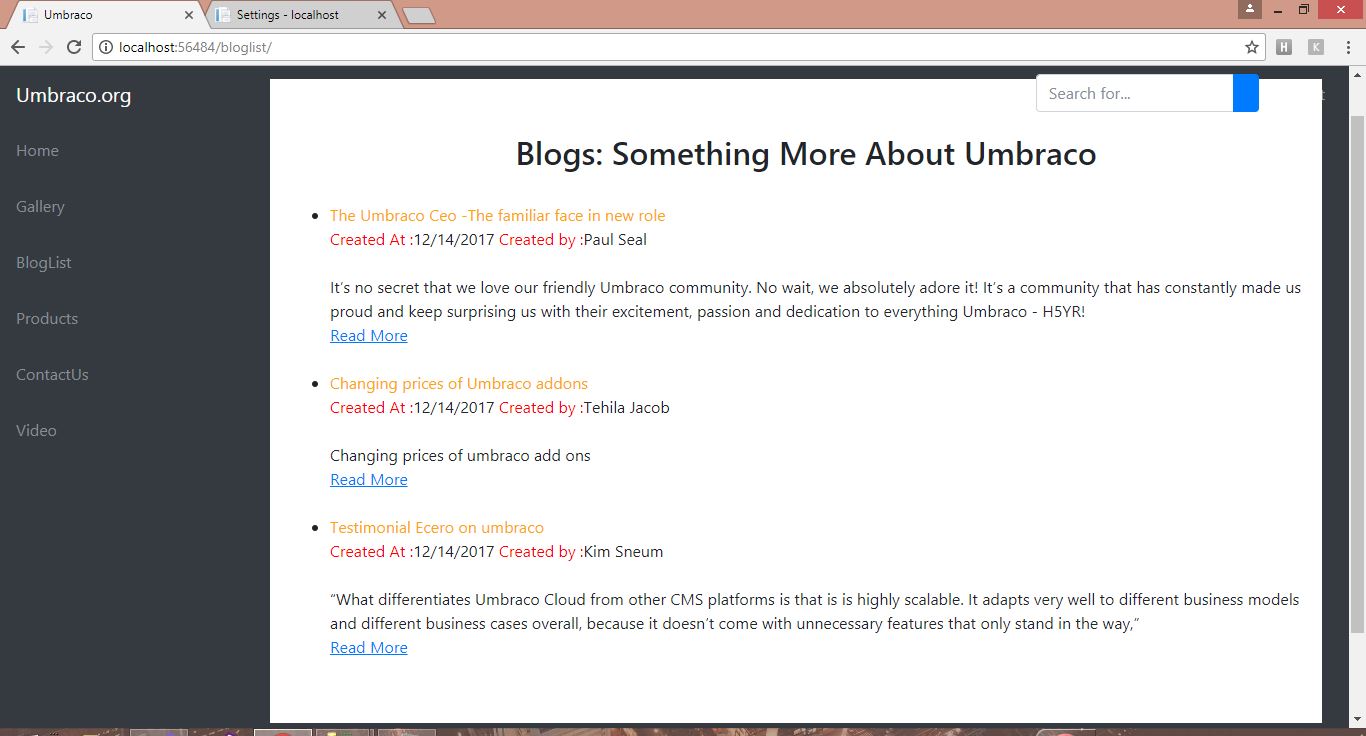
Clicking on the Read More link you can view your entire blog.
In this article we have discussed some basic concepts and created the Blog page . In my next article I will share solution for few of the errors which I had faced when I started to learn umbraco.
Below is the link for the project which I have created using the UmbracoCMS:
Thank you.