
In the current era, it is tough to remain stuck in the same way of doing things. Eventually, we all need to learn, transition and evolve. The same goes for technology as well. That doesn't mean we need to rewrite or redesign what we have developed in the past. Instead, we can start implementing new ways in conjunction with the current one, thus making it interoperable.
SwiftUI has been a significant change that came in much after storyboards in Xcode. Ever since the announcement, everyone has been inquisitive about playing with SwiftUI.
What is SwiftUI?
According to the official Apple developer site,
"SwiftUI is an innovative, exceptionally simple way to build user interfaces across all Apple platforms with the power of Swift. With a declarative Swift syntax that’s easy to read and natural to write, SwiftUI works seamlessly with new Xcode design tools to keep your code and design perfectly in sync."
But why should I transition to SwiftUI?
These are the main reasons why I prefer using SwiftUI over storyboards:
- Gives us an instant, real-time preview(The best thing I like about SwiftUI!)
- Declarative syntax - Simpler code, easier to read and understand
- Automatic support for Dynamic Type and Localization
But wait, can we start using it right away in our current application along with storyboards? The answer is YES!
Here we will be discussing a simple way to use SwiftUI into our existing project, which already consists of a storyboard.
Let's dive in then!
Step 1: Create a view controller as a subclass of UIHostingController. I have named it HostingViewController like the image below:
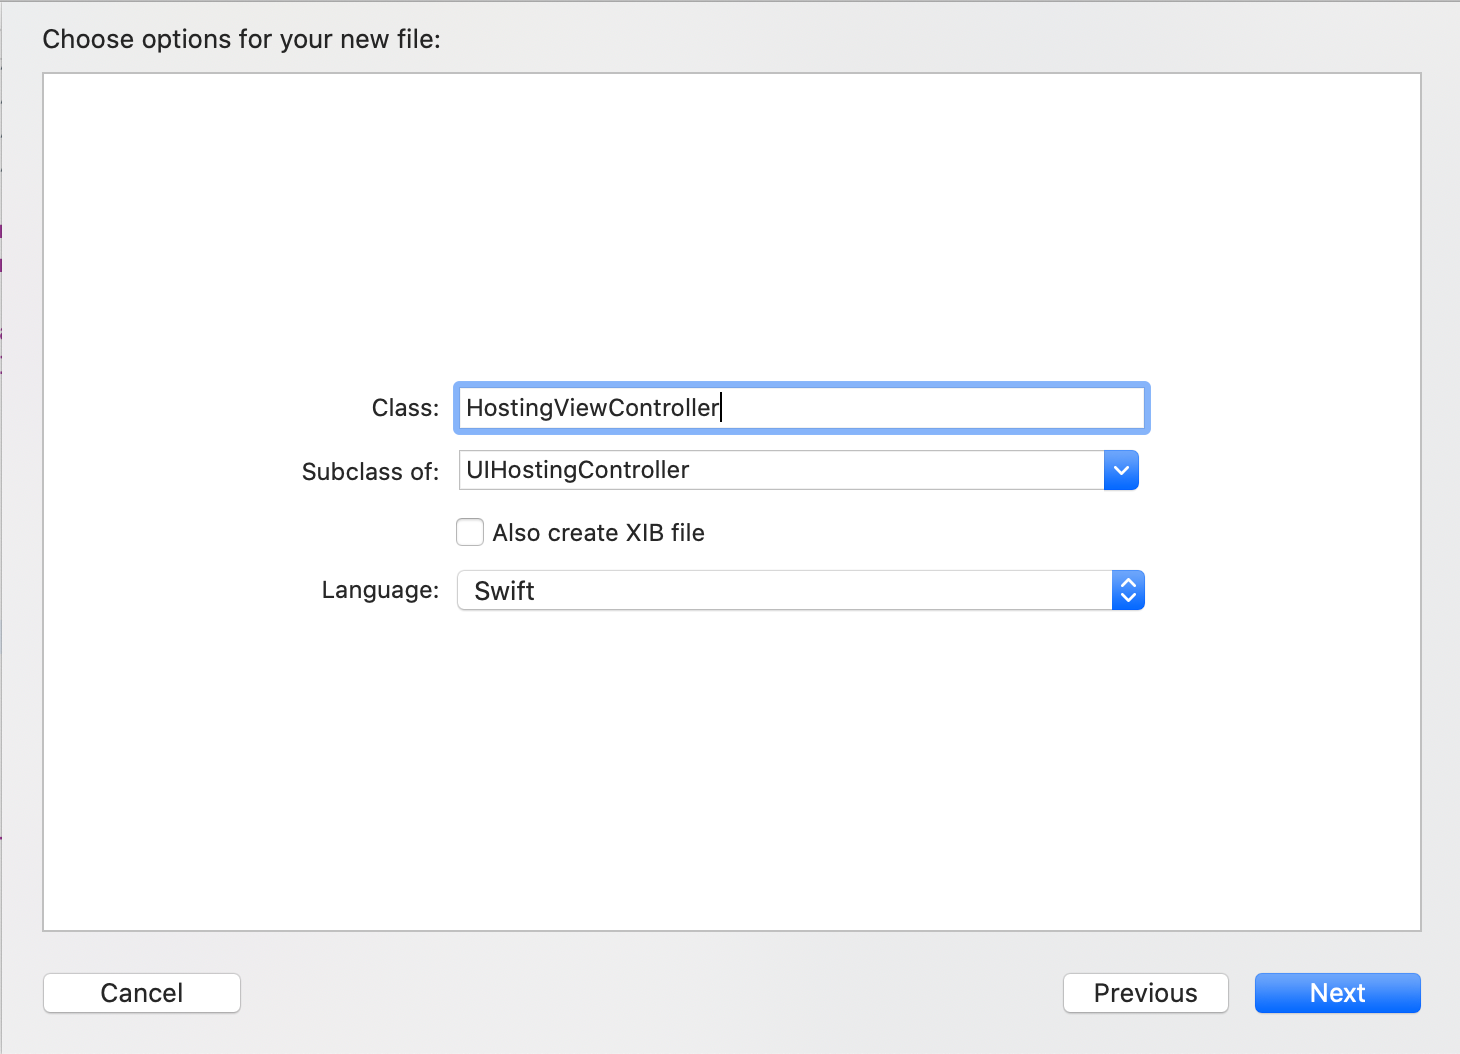
Note: You won't get UIHostingController in the Subclass dropdown, you will have to add it manually.
Step 2: Drag a Hosting View Controller from the Object Library onto the storyboard
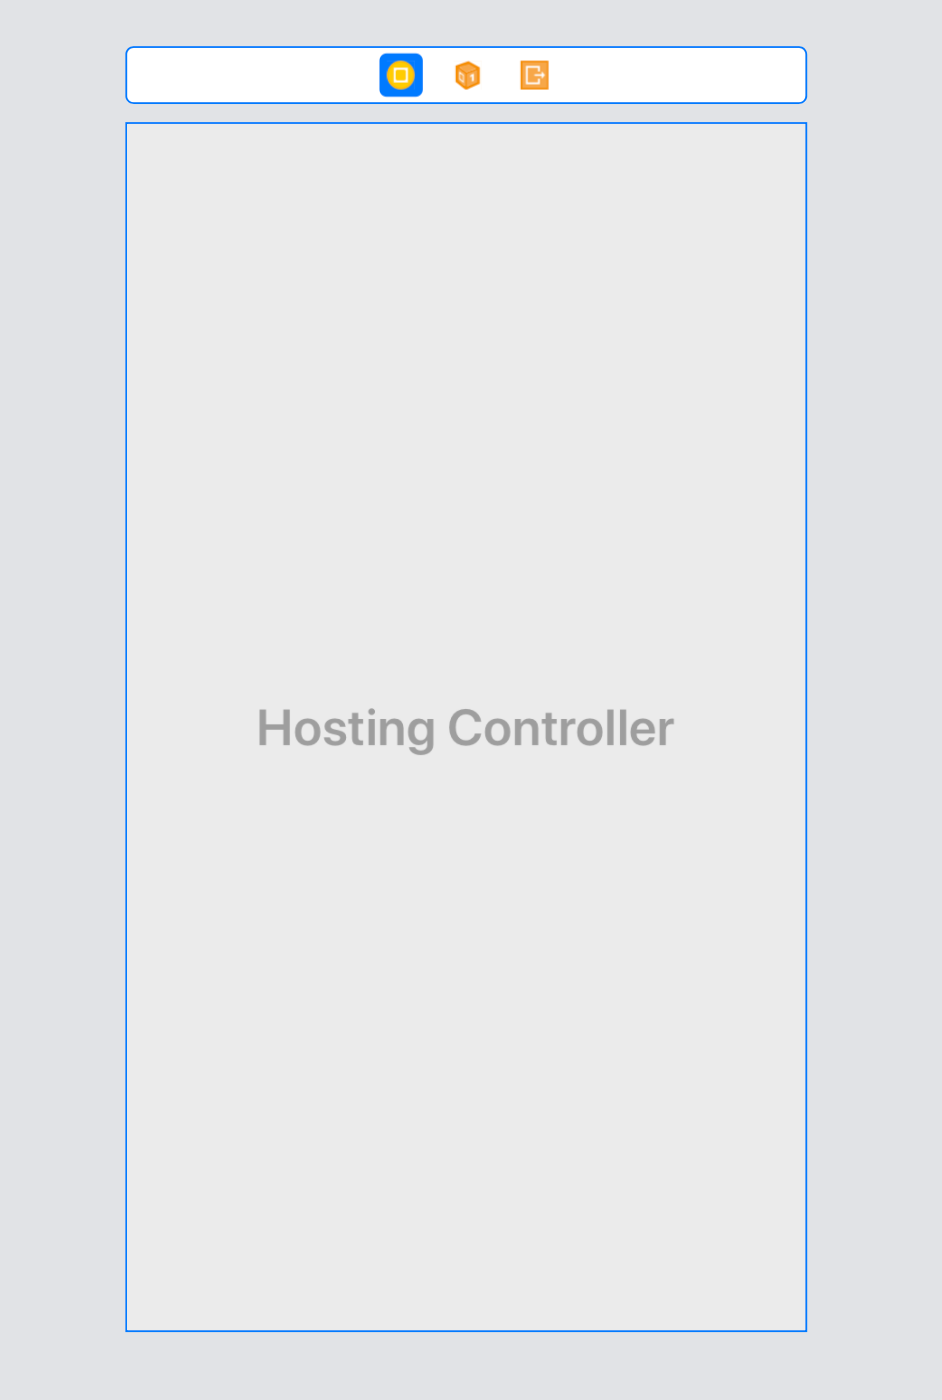
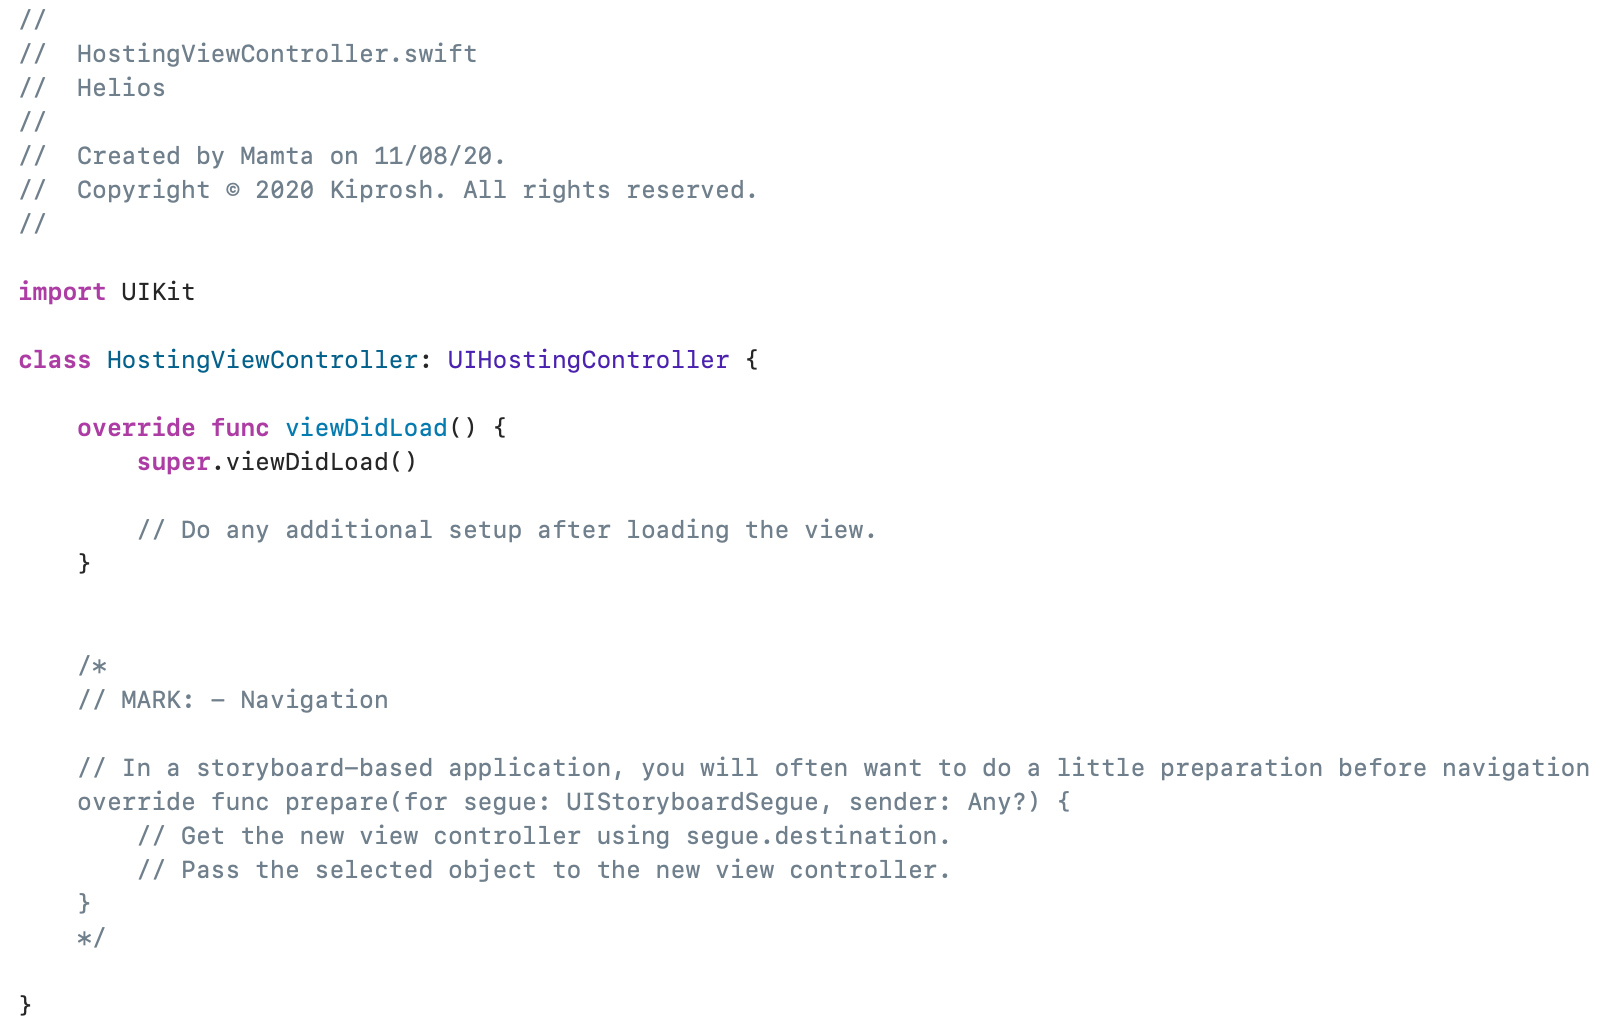
Set the HostingViewController's class to the view controller we just created, namely HostingViewController. The class has this code by default:
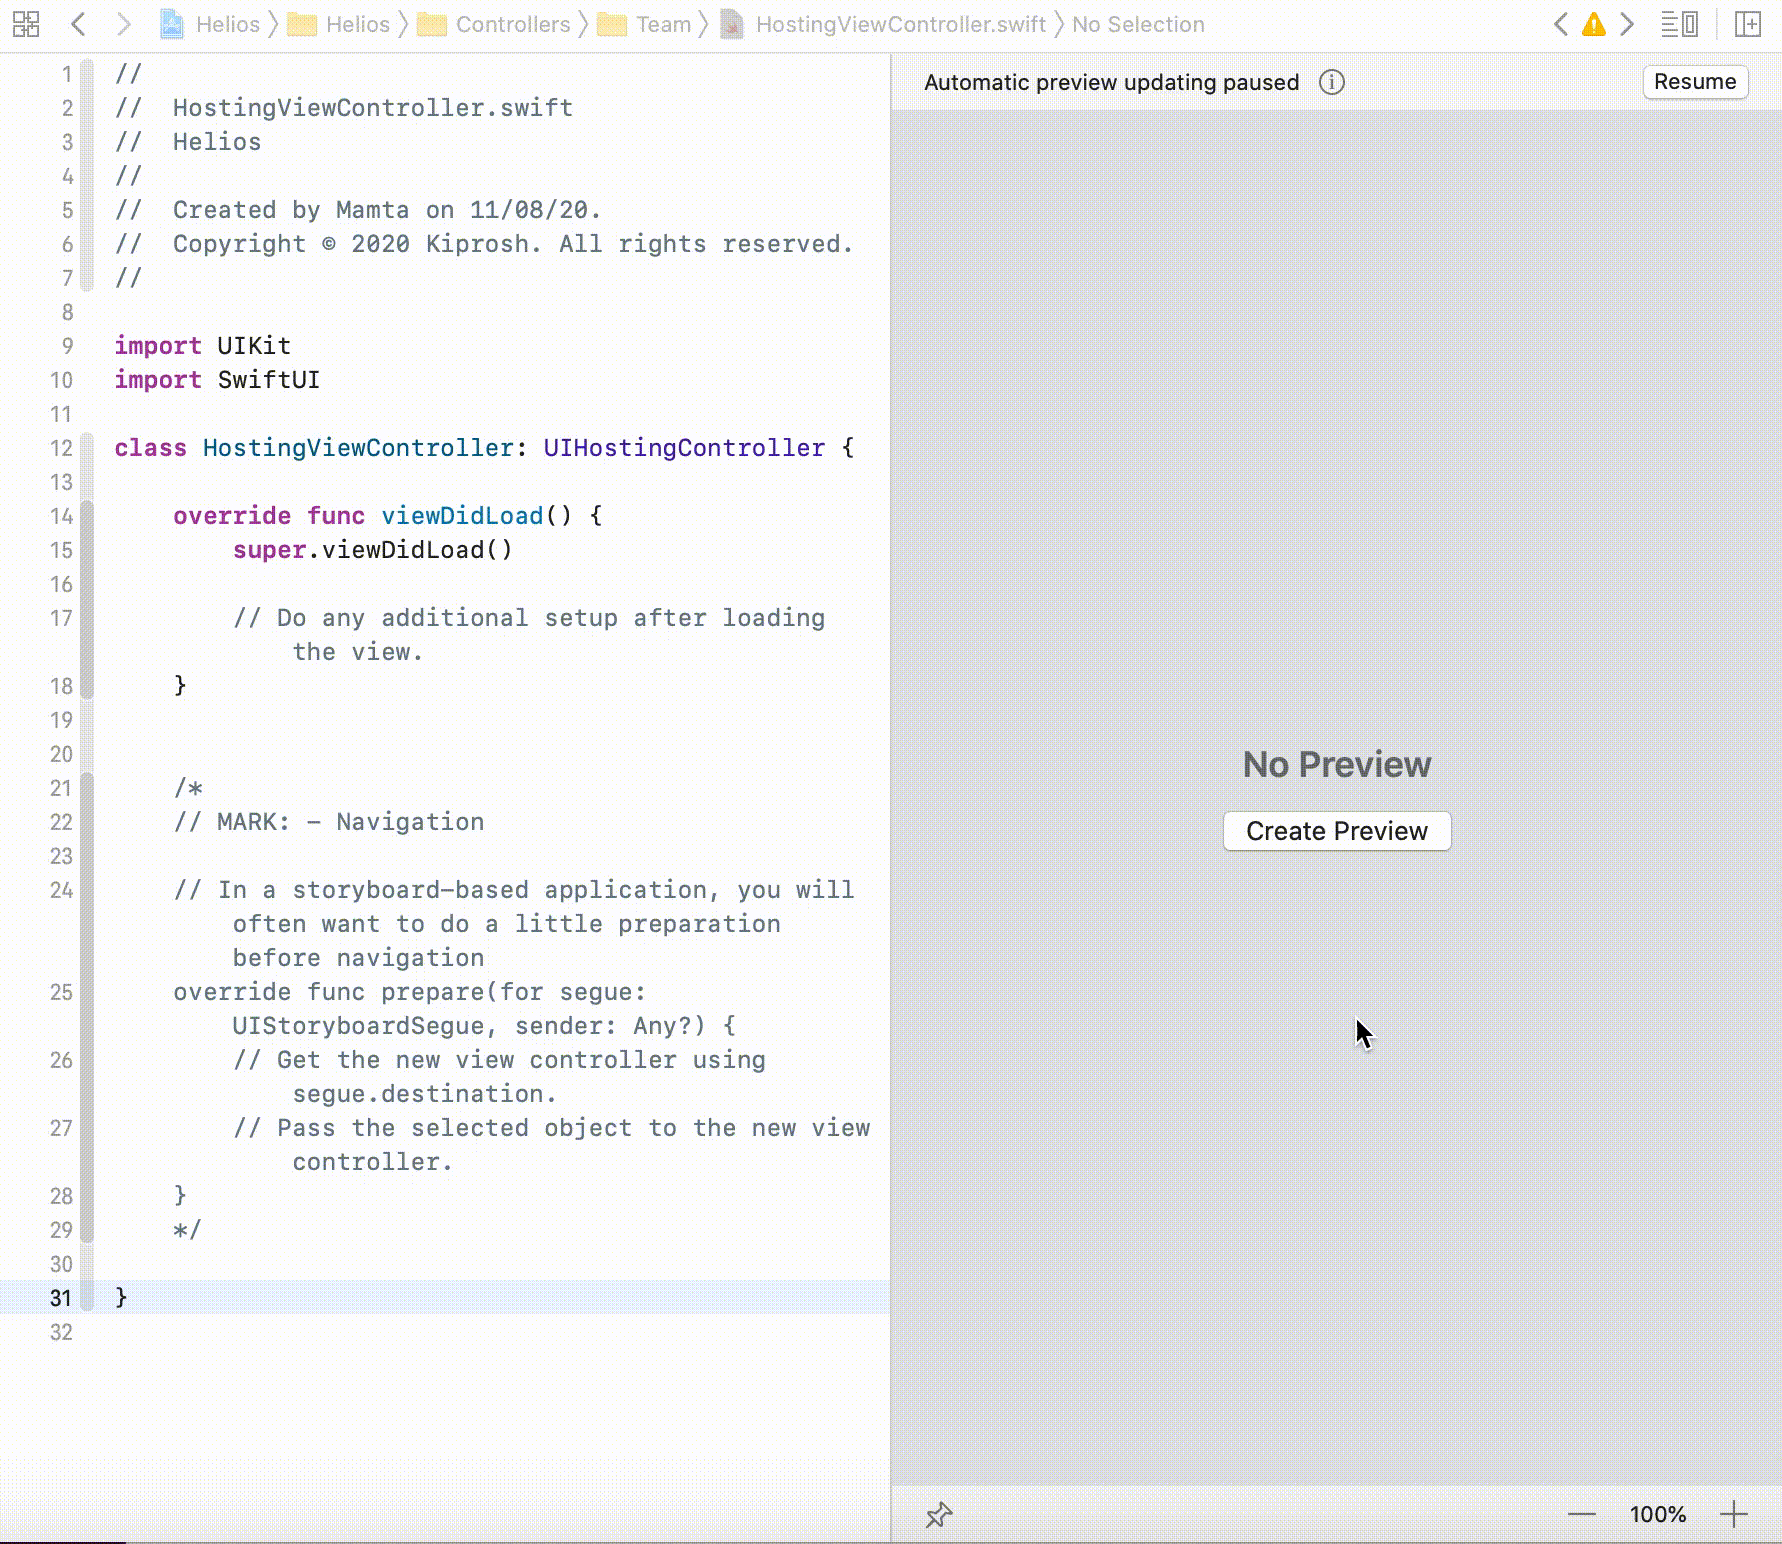
Step 3: We need to add the SwiftUI code now.
For this, we use import SwiftUI. As we build the project, the screen should look like this, with a preview pane on the right:

When we click Create Preview from the preview pane, this is how it generates code on its own:
Note: PreviewProvider is mandatory to see an instant preview in the preview pane.
Let's add its SwiftUI cell view code into a new file LeadCellView as:
struct LeadCellView: View {
var body: some View {
VStack {
HStack {
Text("")
.frame(width: 6.0, height: 60)
.background(Color.blue)
.cornerRadius(8)
VStack(alignment: .leading) {
Text("Mamta Kukreja")
.font(.title)
.fontWeight(.bold)
Text("Kiprosh")
.foregroundColor(.gray)
}.padding(EdgeInsets(top: 0, leading: 5, bottom: 0, trailing: 0))
Spacer()
Button(action: {
print("Test")
}) {
VStack(alignment: .center) {
Image("dots")
.frame(width: 30, height: 48, alignment: .center)
}
}
}.padding(EdgeInsets(top: 0, leading: 0, bottom: 0, trailing: 0))
HStack(spacing: 20) {
VStack(alignment: .leading, spacing: 3) {
Text("Phone number")
.foregroundColor(.gray)
Text("value")
}.frame(minWidth: 0, maxWidth: .infinity, alignment: .leading)
VStack(alignment: .leading, spacing: 3) {
Text("Email")
.foregroundColor(.gray)
Text("value")
}.frame(minWidth: 0, maxWidth: .infinity, alignment: .leading)
}.padding(EdgeInsets(top: 10, leading: 25, bottom: 0, trailing: 25))
.fixedSize(horizontal: false, vertical: true)
.frame(minWidth: 0, maxWidth: .infinity, alignment: .leading)
}.padding(EdgeInsets(top: 0, leading: 0, bottom: 20, trailing: 0))
.shadow(radius: 15)
}
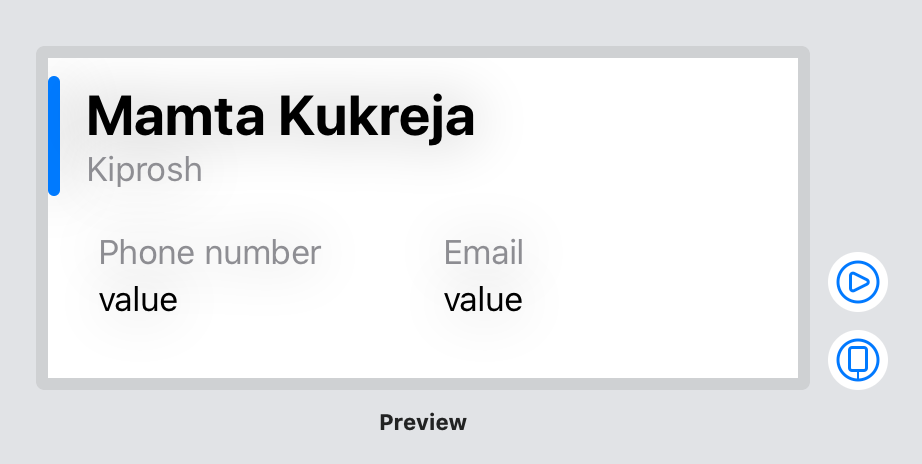
}To see the preview of this cell, write this code below the struct created above:
struct LeadCellView_Previews: PreviewProvider {
    static var previews: some View {
        LeadCellView().previewLayout(.fixed(width: 375, height: 160))
    }
}
Here's how it will look:
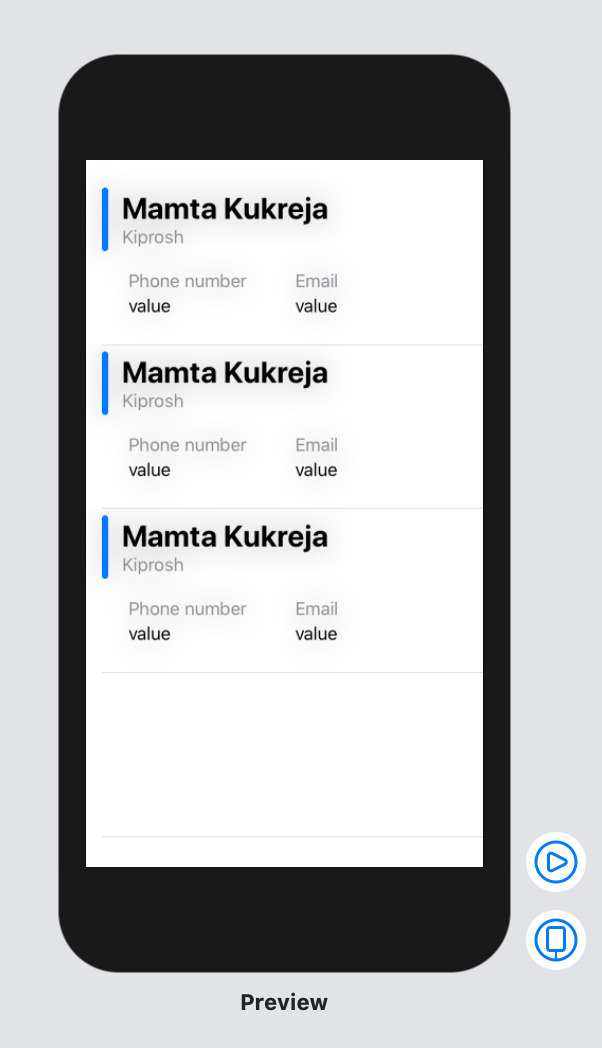
To use this cell, add a struct of a simple list, say ListView into the HostingViewController.
struct ListView: View {
    @available(iOS 13.0.0, *)
    var body: some View {
        List {
            LeadCellView()
            LeadCellView()
            LeadCellView()
        }.navigationBarTitle("Lead List")
    }
}
Let's now use this ListView with the class HostingViewController by adding the name of the view like <ViewName> as follows:class HostingViewController: UIHostingController<ListView> {
Note: If the deployment target is below iOS 13.0, we need to add @available(iOS 13.0, *) which denotes this code will be ignored in previous iOS versions. It will only work on iOS 13.0 or above.
Step 4: We need to add an init method in the class, passing the ListView as rootView to it.
required init?(coder: NSCoder) {
    super.init(coder: coder, rootView: ListView())
}
Let's now click on the Resume button present in the preview pane's top right to see an instant preview of whatever we coded.
Now your project supports both SwiftUI and storyboard.
Step 5: One last step is opening this view controller through another view. This view can be instantiated through code as well as using storyboard segue.
Code: For this method, we need to set StoryboardID to HostingVC and write the following code:
if #available(iOS 13.0, *) {
    let viewController = UIStoryboard(name: "Main", bundle: nil).instantiateViewController(withIdentifier: "HostingVC")
    self.navigationController?.pushViewController(viewController, animated: true)
}
Segue: We can create a segue as with any View Controller on the storyboard.
The major cons of using SwiftUI in ongoing projects is its backward compatibility issue. It does not work with devices below iOS 13.0.
Here's a demo of the same, developed using Xcode 11.4.1.
Hope this transition has been smooth for you.