
In Part 1 we learned some fundamentals of react-native-reanimated, its declarative syntax and its working under the hood by creating a simple Accordion. If you missed the first part, it will be better if you visit it and come back here as lots of concepts covered there will be referred here in this article.
In this blog, we'll understand how to perform translation transformation by creating a shiny effect on the progress bar using react-native-reanimated.
So, let's get started.
Pre-requisites:
- Basic knowledge of
react-native - Basic knowledge of
react-native-reanimatedfrom the previous article
Initialize project:
Let's create our project by running:
react-native init rnr-shiny-progress-bar
We will be using the following dependencies to create our app:
- react (v16.9.0+),
- react-native (v0.61.5+)
- react-native-reanimated (v1.5.0+)
- react-native-linear-gradient (v2.5.6+)
Next, we install react-native-reanimated as follows:
yarn add react-native-reanimated
For iOS, we install pod dependencies for react-native-reanimated as follows:
cd ./ios && pod install
Creating a Progress bar:
We first create a simple Progress bar. react-native-reanimated has an Examples folder which consists of the source code for creating a progress bar. After copying the code from index.js to App.js, we do some minor changes like removing Buttons as they are not needed in our case. With these changes, our App.js looks as follows:
Explanation
In brief, here we have a state variable called progress initialized to 0. On mount of the App component, progress gets updated by 0.1 after every interval of 5 seconds. This progress is sent as props to ProgressBar component. As soon as it reaches 1, we clear the interval. This implies that we have completed 100% progress.
Next, in our root/src/components, we create a component called ProgressBar. Our folder structure looks as follows:
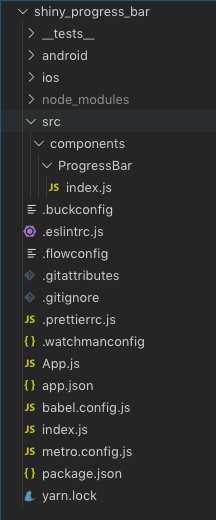
We then copy the code from ProgressBar.js to our ProgressBar component, change defaultProps for height and width and make some style changes. Our ProgressBar component's code looks as follows:
Explanation
- Lines 7-19 extract necessary nodes from
react-native-reanimated'sAnimatedAPI. - Lines 21-55 is the wrapper
runTiming()which is responsible for animation ofProgressBar. It is similar to the one explained in the previous part. - Lines 73-75 initializes necessary nodes for the animation.
- At line 76 we call
runTiming()with necessary parameters and it returns ablockof nodes which is called frame by frame as explained previously.
In render(),
- Lines 84-89 we describe the style for the progress bar. At line 85 we use
concat()to concatenatepositionnode's value returned bythis.transXwith%. - On line 101 we apply this style to the
Animated.View.
As progress updates after an interval, in componentDidUpdate() we set the value of this.animation to the current value of progress multiplied by 100 (as we want to express width in %). Since this.animation is one of the parameters of runTiming(), the block returned by runTiming() is called on every update of this.animation and position node is updated to the current value of this.animation provided as dest frame by frame.
Our ProgressBar looks as follows:
Adding a shiny effect:
Let us add a shiny effect to the Progress Bar. We'll create a shiny effect using
Gradients.
react-native-linear-gradient is a useful package that provides a LinearGradient component for react-native.
We first install react-native-linear-gradient as follows:
yarn add react-native-linear-gradient
For iOS, we install pod dependencies for react-native-linear-gradient as follows:
cd ./ios && pod install
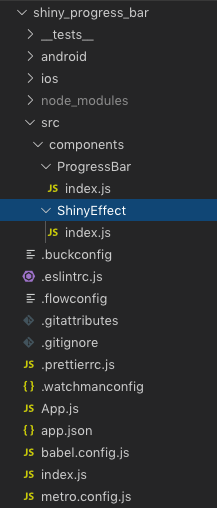
Next, in our root/src/components folder we add a component called ShinyEffect.
We import the following necessary components and APIs
and extract following nodes from react-native-reanimated's Animated API.
Next, we add wrapper called runTranslationTiming() as follows:
Explanation
runTranslationTiming() is similar to runTiming() with one difference that is, it runs repeatedly.
- Lines 25-30 inside the
blocknode check whether the animation is finished by checking whether the flagstate.finishedis set to 1. If it is set to 1 we resetstate.finishedstate.timestate.frameTimestate.position
Since the clock has not been stopped, the animation keeps on repeating.
The code for ShinyEffect component is as follows:
- Line 4 defines Animated value
rangewhich will be useful for translation later. - Line 6 calls
runTranslationTiming()withclock,valueanddestparameters assigned to 0 and 5000 respectively. Note, these values can be as per your choice and are responsible for user experience. So choose them appropriately. Theblockreturned byrunTranslationTiming()is assigned tothis.transX. - Next, inside the
constructor(), we useinterpolateonstate.positionreturned byblockstothis.transX. In animation, interpolation is the process of inbetweening which gives an illusion of movement or motion between two images. Here, we interpolatestate.positionfrominputRange(0,5000) tooutputRange(-500, progress fraction of the width of the bar). Again, theinputRangeandoutputRangevalues have been decided based on user experience. We alsointerpolatestate.positiononcomponentDidUpdate()as well i.e. whenprogressupdates. The output mapping based on input is returned tothis.range. - Lines 25-56 render our
ShinyEffect.- At line 34 we assign
this.rangetotranslateXstyle prop of theAnimated.Viewand that's how we perform translation using interpolation.
- At line 34 we assign
In ProgressBar component we add ShinyEffect only when progress is > 0 as follows:
Explanation
As the progress changes, the block returned by runTranslationTiming() to this.transX executes. It updates the state.position using timing() as explained in the previous blog. Based on the value of state.position in inputRange, its mapped value from the outputRange is returned to this.range which is later mapped to translateX style prop of Animated.View.
And we have a shiny effect on our ProgressBar.
Hope this blog helped you in understanding how translation transformation can be performed using react-native-reanimated.
You can clone this Github repo and experiment with the same.
For the version of code in hooks, switch to the branch hooks-version in the repo.
Thank you for reading.